Film Negative vs Photo Negative vs Grayscale — What's the Difference?
All three terms describe flipping or flattening a picture, and people use them interchangeably. They are not the same thing. Here is what each one actually does to your pixels, when each is the right tool, and how to convert between any two of them in your browser.
The short answer
A film negative is a physical thing: the developed film strip from an analog camera, which stores the picture with light and dark — and every color — inverted, usually on an orange-tinted base. A photo negative is the digital equivalent: any picture that has had its colors flipped with an inversion, whether for effect or for restoration. Grayscale is neither — it keeps the picture right side up and simply discards all color, mapping every pixel to one of 256 shades of gray by brightness. Negative operations flip values; grayscale deletes a dimension.
What a film negative actually is
Color film is coated with three light-sensitive layers that record, respectively, how much blue, green and red light hit them — recorded as the opposite of what was there. A sunny sky, full of light, leaves the film dense and dark; a dark shadow leaves it thin and clear. During development, dye clouds form in each layer, and the film base itself is dyed orange to correct for the imperfections of the dyes. That orange mask is why scanned film looks so strange even after you flip it: a plain inversion restores brightness and the broad color relationships, but the orange tint rides along until you neutralize it with a white-balance pass or remove color entirely.
This is why restoring negatives is a two-concept job — flip, then clean. The film negative to positive converter does the flip in one click in your browser; the section below covers the cleanup.
What a photo negative is
Strip away the chemistry and a negative is just arithmetic: every red, green and blue value becomes 255 minus itself. Apply that to any digital photo and you have made a photo negative — ghostly skin tones, dark skies, light shadows. It is the same transform the film stores physically, which is why the effect reads instantly as "film look". Two practical uses dominate: the artistic one (posters, album art, social edits — the negative image maker produces it in one click) and the restoration one, where you run the transform in reverse on a scan of a real negative to recover the picture the camera saw. Because inversion is its own inverse, double-applying it always returns you exactly to where you started.
What grayscale is (and is not)
Grayscale does not flip anything. It measures how bright each pixel is — weighted so that green counts more than red, and red more than blue, matching how human eyes perceive brightness — and writes that brightness back as a neutral gray from black (0) to white (255). The picture keeps its full tonal structure: skies stay bright, shadows stay dark. What it loses is hue, permanently. That permanence is a feature, not a bug, in the right situation: it erases color casts from aged film, unifies mixed lighting, and produces the classic photographic monochrome look. The grayscale converter does this with the standard luminance formula; if you want a punchier pure black-and-white aesthetic, the black and white photo converter applies a photographic mono tone, and the pure B&W converter pushes everything to just two colors.
The three at a glance
| Film negative | Photo negative | Grayscale | |
|---|---|---|---|
| What it is | Developed film strip, stored inverted | Any digitally inverted photo | Brightness-only copy, no color |
| Direction | Flips light/dark and colors | Flips light/dark and colors | Keeps tone, deletes hue |
| Reversible? | Yes — invert it back | Yes — invert again | No — color is gone for good |
| Tell-tale sign | Orange base, grain, physical strip | Clean inversion, no orange cast | Neutral tones, 256 shades |
| Typical job | Restoring old archives | Art effect, negative-style design | Print prep, mono look, cast removal |
How they combine: the gray negative
The concepts stack. Invert a grayscale image and you get a gray negative — a black-and-white film negative look with highlights and shadows swapped:

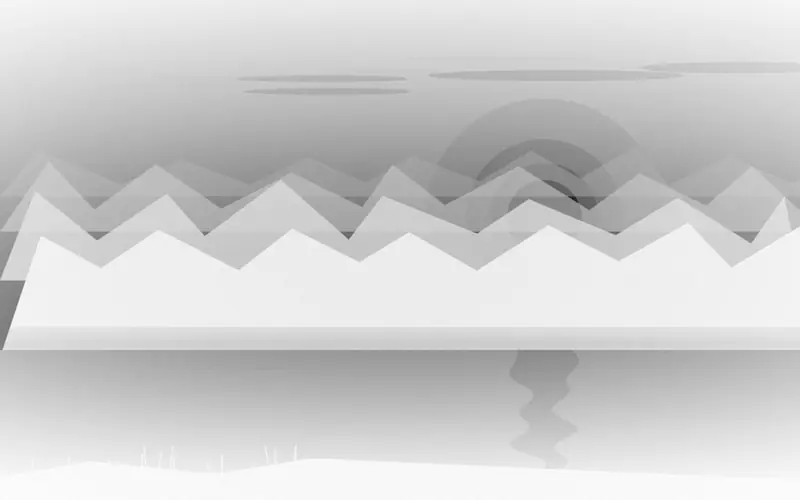
The order matters in one place only: converting a negative to grayscale and inverting it afterwards gives exactly the same pixels as inverting first — both operations are independent per pixel — but grayscale is the one irreversible step, so it should always be last in any pipeline where you might still want the color version back.
Converting between them
- Film negative → photo. Scan or photograph the strip against even light, then run the negative to positive converter. Save PNG so no new compression piles onto an old scan.
- Photo → negative (effect). The negative image maker applies the flip for the artistic look; any general color inverter does the same transform, with per-channel options when you want partial flips.
- Either → grayscale. Run the converted positive (or the negative, if you are going for the gray-negative look) through the grayscale tool. Do this last — it is the step you cannot undo.
- Cleanup pass. If the restored colors still look off after the flip, a white-balance edit (or a grayscale fallback) fixes the orange-mask cast that plain inversion cannot reach.
Which one should you use?
Match the operation to the job. Restoring family archives: film-negative conversion first, cleanup second, grayscale only as a rescue for frames whose color is beyond saving. Making art: photo negative for the film look, grayscale or pure B&W for monochrome statements. Preparing images for print or laser engraving: grayscale, because many print pipelines want luminance only. And whenever you are experimenting, work on a copy or save intermediates as PNG — the reversible steps forgive everything except the grayscale step.
Frequently asked questions
Is a photo negative the same as a film negative?
Not quite. A film negative is the physical film strip as it comes out of the camera — a chemically developed, inverted image, usually with an orange base mask. A photo negative is any digitally inverted picture: apply the same color flip to a normal photo and you have made a photo negative. The looks are similar, but only a film negative carries the orange mask and grain that come from real film chemistry.
Does converting a negative to grayscale help with old scans?
Often, yes. Grayscale discards all color information, which erases the orange or blue color cast that aged film leaves behind after conversion. The tradeoff is that you lose the original colors forever — so convert to a positive first, keep that color version, and only use grayscale when the color is beyond saving or you want a monochrome look.
What happens if I invert a grayscale image?
You get a gray negative: every shade flips to its opposite, so highlights become shadows and shadows become highlights, but no color is introduced. It looks like a black-and-white film negative, and inverting it a second time returns the exact original.
What should I do with a shoebox of old family film negatives?
Scan or photograph each strip, run the scans through a film negative to positive converter, and save the positives as PNG files. Fix white balance or dust afterwards, not before. Convert stubborn, color-faded frames to grayscale as a fallback — a clean monochrome beats a wrong-color photo for family archives.
Do scanned negatives keep more detail than printed photos?
Yes. A negative records the full brightness range the film captured, while a print is a second copy that clips shadows and highlights to fit paper. Scanning the original negative recovers highlight and shadow information that no print ever contained — one reason archives keep going back to the film.
Next step: restore your own negatives
Got scans waiting in a drawer? The free film negative to positive converter flips them in one click — private, instant, full resolution, no watermark.
Open the film converter →Film Negative to Positive
Turn scanned film negatives into viewable photos — orange mask handled, full resolution kept.
Open the film converter →Negative Image Maker
Turn any photo into a film-style negative — or restore a scanned negative back into a photo.
Open the negative maker →Grayscale Image
Convert to natural 256-shade grayscale — the photographic alternative to hard black and white.
Open the grayscale converter →